Land Purchased

Proud owner or more like - now what?

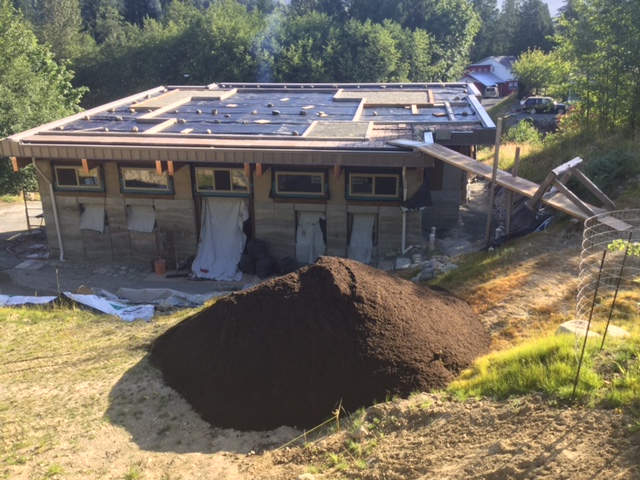
Proud owner or more like – now what?

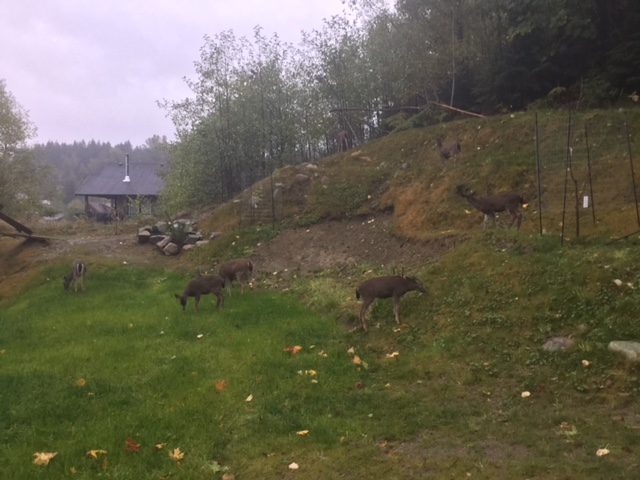
My offer was accepted, June 2013. I was able to get a very good price for the land, but I’m not sure I want to live in Lake Cowichan year around. The town of about 3,000 people is a nice town, as small towns go, but it is 30 km from the town of Duncan and 90 km from the city of Victoria (pop. 250,000). Lake Cowichan feels somewhat isolated. However, it is beautiful country. The air is clear. The lake water quality is rated as one of the highest in British Columbia. There was talk some years ago of bottling the lake water. Beyond Lake Cowichan to the West are trees, more trees, and then the Pacific Ocean. Bears and 300 pound Mountain Lions have been known to visit the town during the night. Elk and deer are common pests in gardens. In fact, any food grown in back yards is an invitation to visitors of the night.
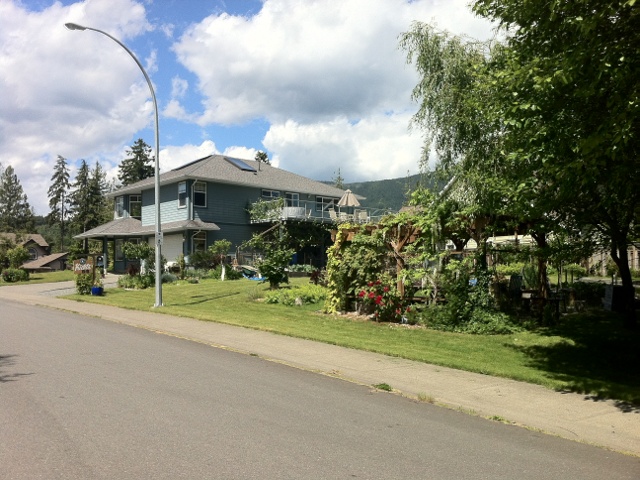
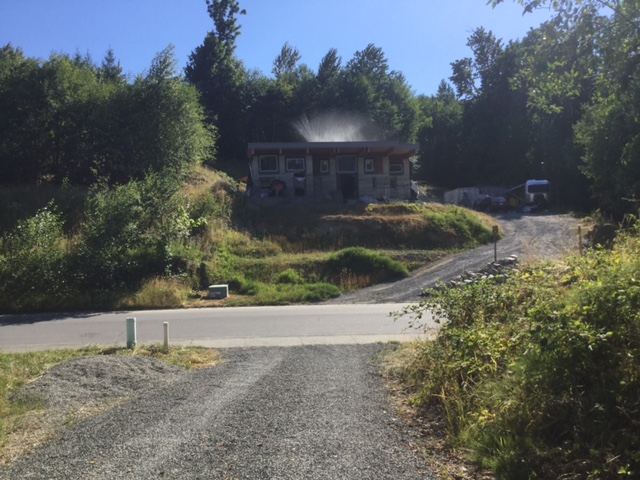
Property in nice area

A neighboring B&B

Point Ideal is the nicest and most convenient subdivision in the town of Lake Cowichan. This isn’t just a biased opinion. One local claims it provides half the property taxes for the town (not too pleased with that). My neighbours are mostly retired, with many B&B’s in the area. During the summer, Lake Cowichan gets quite busy with tourists. 2013 was the busiest on record with over 27,000 visitors, 9 times the population of the area. The other 10 months of the year, the town is quite sleepy … you might say, livin’ is easy, fish are jumpin’ or why all this rain??

Many attractions of the lake are minutes away on foot. I can walk to the beach and marina in 5 minutes. The town grocery store is 1.8 km. A&W, Subway, and a Bar/Restaurant are a 10 minute jaunt. And if I care to be more ambitious, I can hike to Mesachie Lake taking trails through old growth forest. The subdivision is also surrounded by small parks. Next to my property to the West is a 2 acre land reserve. It’s great to have a quiet neighbour (accept for the frogs during the summer, which make quite a racket).

Only 300 meters from lot

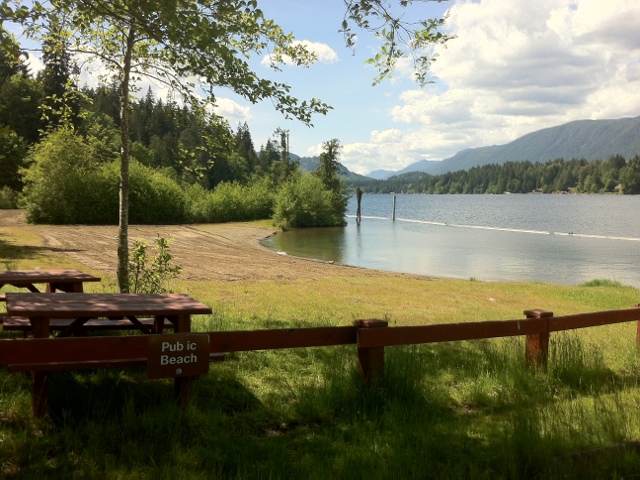
A beach only 300 meters from lot

If I walk past the beach I come across Lake Cowichan’s floating dock. It is very peaceful and surprising how little it is used off-season. It’s great for a morning walk and when the water is warmer a refreshing swim. The floating dock is about 400 meters long and only a few minutes from the beach area. Some residents have tried to fish off the dock, but with little luck. The fish like to hide further up the lake and at the mouth of the river in the town.

Amazing and empty 10 months of the year

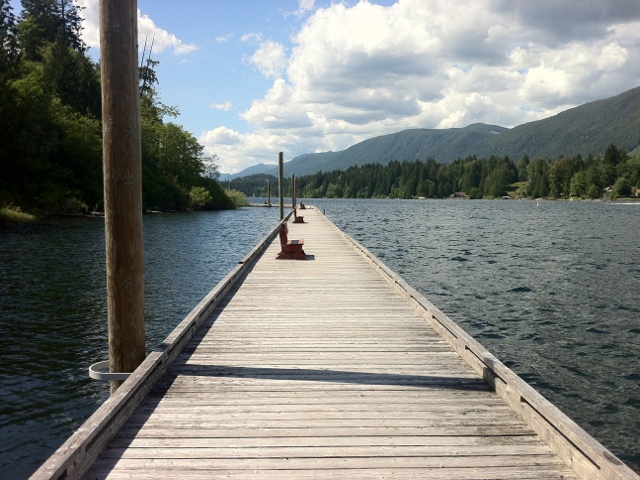
Lake Cowichan Floating Dock – Amazing and empty 10 months of the year


House Siding Installed

I had planned to side the upper windows with Gavalume, but due to the success of the staining of my exterior beams and planks, I decided to do cedar siding at front and back doors. Everyone says I should do more, but I’m happy with the balance.

A little tricky doing the Gavalume here. Too many indents. But I think I figured it out well. This door is quite exposed to the elements to let in the Summer sun in the evening.

A little tricky doing the Gavalume here. Too many indents. But I think I figured it out well. This door is quite exposed to the elements to let in the Summer sun in the evening.

Testing cedar siding before staining.

Testing cedar siding before staining.

Turned out better than I expected. Nice match between cedar, roof, and beams. The gavalume may look out of place, but I think it makes the cedar look better!

Turned out better than I expected. Nice match between cedar, roof, and beams. The Gavalume may look out of place, but I think it makes the cedar look better!

Using my materials to the max. Had extra cedar and not enough Gavalume trim. So this is what ended up. Maybe odd but suits the building.

Using my materials to the max. Had extra cedar and not enough Gavalume trim. So this is what ended up. Maybe odd but suits the building.

Back siding done!

Back siding done!

Pieces for Gavalume. Took four hours to make these. Each window takes about 20 pieces.

Pieces for Gavalume siding. Took four hours to make these. Each window takes about 20 pieces.

West North Siding done.

West North Siding done.

South East Siding done.

South East Siding done.

Front of House Gavalume and Cedar Siding finished.

Front of House Gavalume and Cedar Siding finished.


Wood Stove Burning Bright

It was difficult finding the right stove to fit in the corner of my living room by the patio window. I asked advice from quite a few people and decided on a stove that quite frankly looks “pretty.” It has a very nice fire through the glass, but doesn’t burn as long as I hoped. A good portion of it was paid for by my mom and aunt.

Doing a mockup of wood stove pipe to make sure I order the right lengths and create the best aesthetics.

Doing a mockup of wood stove pipe to make sure I order the right lengths and create the best aesthetics.

Wood stove arrives.

Wood stove arrives.

Mockup of wood stove pipe exit to the elements.

Mockup of wood stove pipe exit to the elements.

Something I fabricated to help solve what I thought to be a design flaw in the stove pipe fittings. Helps seal moisture from from getting inside and still allows the pipe to cool.

Something I fabricated to help solve what I thought to be a design flaw in the stove pipe fittings. Helps seal moisture from from getting inside and still allows the pipe to cool.

Making Wood Stove Pipe fittings.

Making Wood Stove Pipe fittings.

Cooking some soup on the new wood stove.

Cooking some soup on the new wood stove.

Everyone needs a drink while watching the fire.

Everyone needs a drink while watching fire.

I think i managed to match pipe support with Gavalume siding. Looks very mechanical. Hope the WETT inspector likes it.

I think i managed to match pipe support with Gavalume siding. Looks very mechanical. Hope the WETT inspector likes it.

I rigged up a temporary wood stove support till I building railing. Very solid and ain't' going nowhere.

I rigged up a temporary wood stove support till I building railing. Very solid and ain’t’ going nowhere.


Love Those Deer

In Lake Cowichan wild life is everywhere. Eagles, crows, bears, Elk, Mountain Lions, Mice, Raccoons, and of course DEER!

There go the deer messing up my new grass seedlings.

There go the deer messing up my new grass seedlings.

Tractor looks like it is ready to do work, but actually I was shooting that nosy deer.

Tractor looks like it is ready to do work, but actually I was shooting that nosy deer.

How many deer can you spot?

How many deer can you spot?

Fencing to help protect my Cherry Tree from those pesky deer.

Fencing to help protect my Cherry Tree from those pesky deer.


Preparing a Sun Room

The sun room was an inspiration after my niece visited and sat in the sun where I had planned to put a window. Of course this sun room only gets sun during the summer but you can see the stars at night all year round.

Some creative rebar techniques and forming. I decided to make a sunroom to extra space in a small office area. Quite happy the way it turned out.

Some creative rebar techniques and forming. I decided to make a sun room to give extra space in a small office area. Quite happy with the way it turned out.

Sunroom waterproofing.

Sun Room waterproofing.

Supported by dirt and ready for framing.

Supported by dirt and ready for framing.

Framing for Sunroom

Framing for Sun Room

Preparing skylights for flashing.

Preparing skylights for flashing.

Skylight framing done. But far from waterproof. Have to keep them covered in plastic till I have time to do the flashing and siding.

Skylight framing done. But far from waterproof. Have to keep them covered in plastic till I have time to do the flashing and siding.

Putting in holes to allow walls to breath to the outside.

Putting in holes to allow walls to breath to the outside.

Second Flashing layer for skylight.

Second Flashing layer for skylight.

Tricky getting at the walls and windows to do the siding for Sun Room. Multiple layers of rain protection saw water never gets in, hopefully?!

Tricky getting at the walls and windows to do the siding for Sun Room. Multiple layers of rain protection s0 water never gets in, hopefully?!


Green Roof Growing Grass

I put 30 tons of gravel and dirt up on the roof. Seems like a lot, but the roof is very strong. It feels like ground up there. Eventually, I hope to have a garden on the roof and grow potatoes, tomatoes, what not.

What color??

What color??

I made over fifty of these to help divide sections on the green roof.

I made over fifty of these to help divide sections on the green roof.

Concrete dividers on roof. Wonder what the finished product will look like.

Concrete dividers on roof. Wonder what the finished product will look like.

Gravel on green roof between dividers. Starting to take shape.

Gravel on green roof between dividers. Starting to take shape.

Green Roof perimeter is filled with dirt.

Green Roof perimeter is filled with dirt.

One wheel barrow at a time. Lucky the fellow driving the dump truck was able to maneuver into my back yard. A feat unto itself.

One wheel barrow at a time. Lucky the fellow driving the dump truck was able to maneuver into my back yard. A feat unto itself.

Getting the dirt to the roof, one wheel barrow at a time.

Got the dirt to the roof, one wheel barrow at a time. Took less time than I thought.

I this what they mean by a "Green" roof?

Is this what they mean by a “Green” roof?

Grass is growing great!

Grass is growing great!

Trying to get creative.

Trying to get creative.

Having some fun on the roof.

Having some fun on the roof.

My roof has water hair. Looks beautiful :)

My roof has water hair. Looks beautiful 🙂


Putting in Doors

It was a frustrating ordeal buying doors, not only figuring out door design, but also dealing with suppliers. It was probably the toughest time I had trying to get quotes. I settled on a local supplier and was happy with the final product. But putting them in was lots of fun, as usual. And painting them before hand took weeks.

Trying to visualize and plan for door glass.

Trying to visualize and plan for door glass.

Two coats of primer and three coats of exterior paint. I wonder how long it will last?

Two coats of primer and three coats of exterior paint. I wonder how long it will last?

Painting door frames with my special mix.

Painting door frames with my special mix.

Making the copper flashing corners.

Making the copper flashing corners.

Copper Door flashing for looks and protection.

Copper Door flashing for looks and protection.

Putting in the first door. Four layers of sill protection. Wonder if it will actually work? Don't trust sealants.

Putting in the first door. Four layers of sill protection. Wonder if it will actually work? Don’t trust sealants.

Raising French Doors. Notice the wood to keep the door from falling through. Have to do these things when you work alone.

Raising French Doors. Notice the wood to keep the door from falling through. Have to do these things when you work alone.


Pouring Concrete Floor

I poured the concrete floor in 25 sections. Five section per room and hallway. The concrete mix is about 4000 PSI and it’s heavily rebarred. After 8 months, no cracking whatsoever. I only wish I would’ve kept it wet longer. Concrete likes a little bit of moisture as it cures. The longer you keep it moist, the stronger it gets.

I toyed with the idea of creating a rammed earth floor and did a test outside. The test was successful, but too time consuming to create. And not quite as smooth as poured, troweled concrete.

I toyed with the idea of creating a rammed earth floor and did a test outside. The test was successful, but too time consuming to create. And not quite as smooth as poured, troweled concrete.

My first concrete pour for interior. I have no idea what I've gotten myself into. Everyone says I'm crazy to do it this way.

My first concrete pour for interior. I have no idea what I’ve gotten myself into. Everyone says I’m crazy to do it this way.

Office bathroom poured in section to allow for future development of shower drainage.

Office bathroom poured in section to allow for future development of shower drainage.

That's what a lump of concrete look like before being troweled.

That’s what a lump of concrete look like before being troweled.

This is how your hands looks after working with concrete and not being well protected.

This is how your hands looks after working with concrete and not being well protected.

Doing some tricky form work to pour kitchen concrete floor and make room for future electric floor heat.

Doing some tricky form work to pour kitchen concrete floor and make room for future electric floor heat.

Notice how the rebar extends through the forms into the next pad.

Notice how the rebar extends through the forms into the next pad.

I drilled no holes. All forms were supported with weight or wood. It was rather tricky. Each pour was unique. But it worked fantastic.

I drilled no holes. All forms were supported with weight or wood. It was rather tricky. Each pour was unique. But it worked fantastic.

Pour sections in sequence so the poured edges act as a form for the next section.

Pour sections in sequence so the poured edges act as a form for the next section.

This storage room is halfway in between. Essentially, I dumped two or three wheel barrows of cement that smoothed it up. This size of pad was easy at 28 sq. ft. But over 60 sq. ft. was tough. Cement on the first pour was drying before the last pour. Tricky getting it smooth.

This storage room is halfway in between. Essentially, I dumped two or three wheel barrows of cement that smoothed it up. This size of pad was easy at 28 sq. ft. But over 60 sq. ft. was tough. Cement on the first pour was drying before the last pour. Tricky getting it smooth.

Concrete floor in kitchen with lower level for future electric floor heat.

Concrete floor in kitchen with lower level for future electric floor heat.


Installing Electrical Panel

I decided on a 200 amp service and a big panel to give myself options when installing outlets. Installing an electric panel seems to be a scary proposition, but it’s really quite satisfying. When you turn on power for the first time, it really is electric.

Doing a test of grinding the concrete to see if it looks good. This area was covered by my meter box. But it looks amazing.

Doing a test of grinding the concrete to see if it looks good. This area was covered by my meter box. But it looks amazing.

Have the wires ready for the power company to pull through. They came while I was away and did it without any fuss. Said I did a good job when I ran into them a few days after.

Have the wires ready for the power company to pull through. They came while I was away and did it without any fuss. Said I did a good job when I ran into them a few days after.

Those big aluminum wires look scary. That's why you keep them hidden when doing the panel. You don't want to touch them, ever!

Those big aluminum wires look scary. That’s why you keep them hidden when doing the panel. You don’t want to touch them, ever!

Securing the panel without a wall. Electrical inspector passed it with no concerns.

Securing the panel without a wall. Electrical inspector passed it with no concerns.

My temporary wire routing.

Let there be light!

Let there be light!


Insulating the Floor

I used R20 insulation for the floor, as well as R10 up the sides to keep the walls from creating a thermal bridge and sucking out heat from electric floor heating. The insulation has a high compression rating at 40 PSI.

Tricks for leveling the floor for insulation. Learned this doing pavers for my sister.

Tricks for leveling the floor for insulation. Learned this doing pavers for my sister.

Preparing floor for insulation. R-20 Planned.

Preparing floor for insulation. R-20 Planned.

Insulation ready to be placed.

Insulation ready to be placed.

Decided to add an extra drain for the master bedroom. Possibly a shower.

Decided to add an extra drain for the master bedroom. Possibly a shower.

Installing 10 mm plastic Vapour Barrier for floor. This is the only place I trust plastic in a house.

Installing 10 mm plastic Vapour Barrier for floor. This is the only place I trust plastic in a house.


Windows Arrive

It took me a few months to get all the windows in. I had to figure out a good flashing design and although waterproof, wasn’t exactly pretty. Nevertheless, no leaks and performing great.

Windows have arrived.

Windows have arrived.

I think I went overboard with my BlueSkin flashing.

I think I went overboard with my BlueSkin flashing.

Front Side Window ready to be placed.

Front Side Window ready to be placed.

Preliminary Flashing for Back Window

Preliminary Flashing for Back Window

Getting ready with scaffolding for a formidable task.

Getting ready with scaffolding for a formidable task.

The big sky window is in. Dropped it twice while trying to place it myself. Kind of stupid to attempt this alone. But each time it dropped, I caught it. A considerable feat since the window weights about 150 pounds.

The big sky window is in. Dropped it twice while trying to place it myself. Kind of stupid to attempt this alone. But each time it dropped, I caught it. A considerable feat since the window weights about 150 pounds.